The suspension system of a vehicle is a critical component that significantly affects ride quality, handling, and overall safety. When problems arise within this system, they can lead to a myriad of driving issues, such as poor handling, excessive tire wear, and even compromised vehicle safety. Understanding how to diagnose and address these common suspension problems is essential for both vehicle performance and driver confidence.
One of the most frequent issues that drivers encounter is uneven tire wear, which can often be traced back to suspension misalignment or damaged components. Symptoms like excessive bouncing or swaying can indicate that shock absorbers or struts are failing, necessitating immediate attention. By recognizing these signs early, vehicle owners can not only improve ride quality but also extend the lifespan of their tires and suspension components.
In this article, we will explore the most common suspension problems, how to diagnose them effectively, and provide practical solutions for repairs. Whether you are a seasoned mechanic or a car enthusiast looking to expand your knowledge, understanding these aspects will empower you to maintain your vehicle’s suspension system and ensure a safer driving experience.
Identifying Signs of Suspension Wear and Damage
Recognizing the symptoms of suspension wear and damage early can save you time and money. Here are the key indicators to look out for:
- Uneven Tire Wear: Inspect your tires regularly. If you notice uneven wear patterns, it could indicate misalignment or worn suspension components.
- Excessive Bouncing: If your vehicle continues to bounce after hitting a bump, the shock absorbers may be failing.
- Pulling to One Side: If your car pulls to one side while driving, it may be a sign of suspension issues or misalignment.
- Strange Noises: Clunking, squeaking, or grinding noises while driving can signal worn mounts, bushings, or struts.
- Difficulty Steering: If the steering feels loose or unresponsive, it may indicate problems with the suspension system.
- Vehicle Tilt: If your vehicle leans to one side when parked or while driving, it may suggest a weak spring or damaged shock absorber.
- Fluid Leaks: Check for oil or hydraulic fluid leaks near shock absorbers. Leaking fluid is a clear sign of damage.
Regular vehicle maintenance and inspection of the suspension system are crucial in ensuring a safe driving experience. If you notice any of these signs, consult a professional mechanic for assessment and repair.
Step-by-Step Guide to Inspecting Suspension Components

The inspection of suspension components is crucial for ensuring vehicle safety and performance. Follow this step-by-step guide to thoroughly assess the condition of your vehicle’s suspension system.
Step 1: Prepare the Vehicle
Start by parking the vehicle on a flat, stable surface. Engage the parking brake and, for added safety, place wheel chocks behind the rear wheels. Make sure the vehicle is turned off before proceeding.
Step 2: Visual Inspection
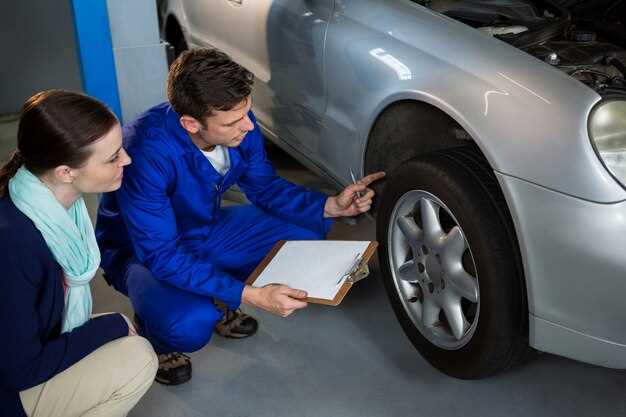
Begin with a visual check. Look for signs of wear or damage on the suspension components including control arms, bushings, shocks, and struts. Check for rust, cracks, or any deformities. Ensure that all mounting hardware is present and secure.
Step 3: Check for Leaks
Inspect shock absorbers and struts for any fluid leaks. A failing shock will often show signs of oil on the exterior. If fluid is present, replacement is typically necessary.
Step 4: Test for Play
With the vehicle still on the ground, test for play in the suspension. Grasp the wheel at the 12 o’clock and 6 o’clock positions. If there is movement, this may indicate worn bearings. Repeat this process at the 9 o’clock and 3 o’clock positions to check for steering linkage movement.
Step 5: Inspect Coil Springs
Examine the coil springs for any signs of fracture or sagging. A broken spring can lead to misalignment or an uneven ride height. Ensure that springs are still properly seated in their mounts.
Step 6: Assess Bushings
Inspect all rubber bushings throughout the suspension for any signs of cracking or degradation. Damaged bushings can lead to increased road noise and unnecessary wear on other suspension components.
Step 7: Evaluate Ties and Ball Joints
Check tie rods and ball joints for any signs of wear. Look for cracked rubber boots and listen for any clunking noises when moving the steering. Play in these components can affect steering precision and suspension performance.
Step 8: Test Drive
After completing the visual inspection, take the vehicle for a short test drive. Pay attention to the handling characteristics such as noises, vibrations, or a loose feeling in the steering. These can be signs of suspension issues needing further evaluation.
Step 9: Consult a Professional
If any issues are detected during your inspection, consult a professional mechanic for a comprehensive evaluation. Timely repairs of suspension problems can prevent more significant damage and ensure safety on the road.
Practical Techniques for Repairing Suspension Issues

Addressing suspension issues requires a systematic approach to diagnosis and repair. Begin by performing a thorough visual inspection of the components. Look for signs of wear, rust, or damage on springs, shocks, struts, and control arms. Pay close attention to bushings and joints, as these often wear out first.
Next, check the alignment of the wheels, as misalignment can lead to premature wear on suspension parts and uneven tire wear. Use an alignment machine or a simple method with a measuring tape and level to assess and adjust the angles of the wheels as necessary.
For specific issues like excessive bounce or noise, consider replacing worn shock absorbers or struts. To do this, lift the vehicle securely, remove the wheel, and access the suspension components. Use appropriate tools to detach the old shock or strut, install the new one, and ensure secure attachment points before lowering the vehicle.
If you experience issues like a rough ride or pulling to one side, check the springs for sagging or breakage. Replace any faulty springs to restore proper ride height and handling. Always install components in pairs (front or rear) to maintain balanced performance.
When dealing with loose components, examine the bushings on control arms and sway bars. If they show signs of deterioration, replace them to enhance stability and control. Ensure that all fasteners are torqued to manufacturer specifications to prevent future issues.
After all repairs, perform a road test to evaluate the suspension’s behavior under different conditions. Listen for any unusual noises and monitor handling characteristics. If problems persist, consult a professional for deeper diagnosis and repair.

